

If you want to do anything at all interesting with your phone once you have unlocked the bootloader, you will need to install custom recovery software on it. And if you are going to install a custom recovery image on your phone, you are going to want to install Team Win Recovery Project, more commonly known by its abbreviation TWRP, the most popular, open source custom recovery software for Android phones.
If you are reading this post, then you likely already know the advantages of installing a custom recovery like TWRP. For those that don’t, TWRP offers a plethora of functionality that stock recoveries do not. With TWRP, you can install custom ROMs and kernels on your phone. You can backup and restore your entire phone including partitions that normal backup apps can’t touch including boot and system. You can wipe, repair and reformat partitions. And most importantly for most Android hackers, with TWRP you can root your phone by installing a super user (root) app like the very popular SuperSu by chainfire.
In the remainder of this post, I’ll outline the steps I took to successfully install TWRP on my Moto G5 Plus. I encountered a few bumps along the way, so hopefully by sharing what I learned, I can save you some time and aggravation as you take the next step along the path to rooting your Moto G5 Plus. Let’s get started.
Prerequisites
- A Bootloader Unlocked Moto G5 Plus Phone
If you have not yet unlocked your bootloader, please visit my post “How to Unlock the Moto G5 Plus Bootloader.”
- A PC running Windows, OS X, or Linux
I am using an Apple PowerBook Pro running Ubuntu 16.10 Yakkety Yak.
- The latest Motorola drivers
Windows (and possible OS X) users will need these, but Linux users will not.
Download link:
motorola-global-portal.custhelp.com/app/answers/detail/a_id/88481
Follow Motorola’s instructions to make sure your drivers are installed correctly. - A USB B to Micro USB cable
- The Android Debug Bridge (ADB) and Fastboot programs
Originally you had to download the entire Android SDK if you wanted just these two programs. Fortunately Google recently made available for download the Android Platform-Tools package containing these programs. The most recent software is available for download at:
https://developer.android.com/studio/releases/platform-tools.html
Download the appropriate version for your OS and install adb and fastboot according to Google’s instructions. - TWRP for Moto G5 Plus (codename Potter)
As of right now there is no official release of TWRP for the Moto G5 Plus. A few talented individuals on the XDA Developers forums have compiled versions that work very well though.
At first I installed the TWRP 3.1.0-0 image that kicks off this thread:
forum.xda-developers.com/g5-plus/development/unofficial-twrp-3-1-0-0-moto-g5-plus-t3576575
More recently in the same thread, user Nijkerk posted a TWRP 3.1.1-0 build that fixes a few bugs in the 3.1.0-0 version like not being able to mount external SD cards or take snapshots within TWRP.
Download link:
twrp-3.1.1-0-GtrCraft-potter.img
TWRP Installation on the Moto G5 Plus
- Back up your phone. If you are installing TWRP immediately after unlocking your bootloader then you wouldn’t have any apps or data on it, but if you’ve been using your phone, backup anything you don’t want to lose. This procedure will cause you to lose all of the data!
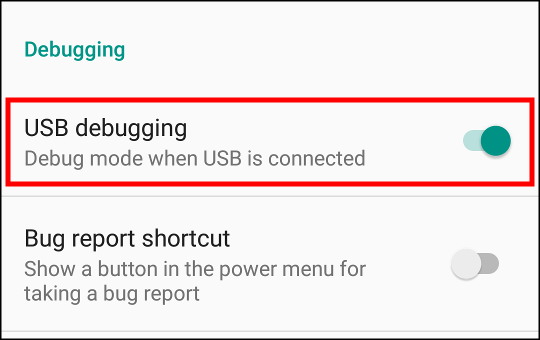
- Verify that Developer Options settings are activated on your phone and USB debugging is enabled.
For a refresher on how to activate Developer Options, please read “How to Enable Developer Options in Android 7 Nougat“.
To enable USB debugging, Go to Settings →Developer Options and scroll down until you find USB debugging. Turn it on if it is not already.
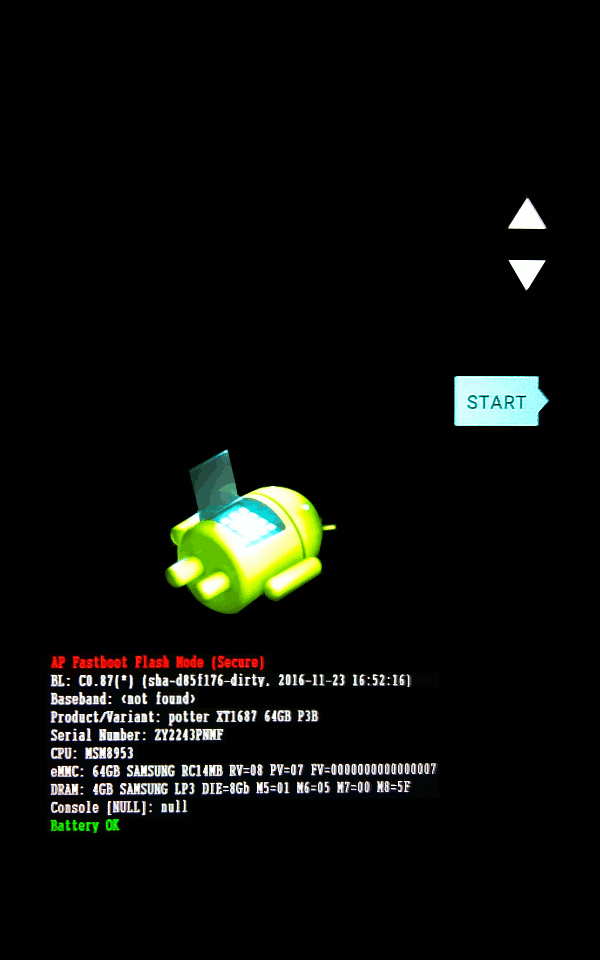
- Boot your phone into fastboot mode. First, fully power down your phone. Then press and hold the power button and volume down button simultaneously until the fastboot screen appears.
- Plug your phone into your PC.
- Open a terminal session, navigate to the directory where you have saved the TWRP image, and run fastboot flash recovery twrp-3.1.1-0-GtrCraft-potter.img. DO NOT reboot your phone yet.
tpodlaski@Alabama:~$ fastboot flash recovery twrp-3.1.1-0-GtrCraft-potter.img
(bootloader) slot-count: not found
(bootloader) slot-suffixes: not found
(bootloader) slot-suffixes: not found
(bootloader) has-slot:recovery: not found
target reported max download size of 536870912 bytes
sending 'recovery' (11500 KB)...
OKAY [ 0.281s]
writing 'recovery'...
(bootloader) Image not signed or corrupt
OKAY [ 0.167s]
finished. total time: 0.448s
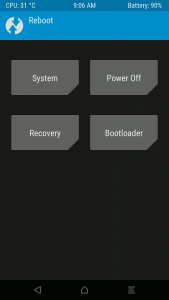
- Reboot immediately into recovery mode. Do not boot into the system first! If you are on the stock ROM and boot into the system and not into recovery, it will overwrite TWRP and you will have to reinstall it. Use the volume down button to navigate through the bootloader options until you get to Reboot Recovery. Press the power button to select and reboot.
The first thing you may notice is that in the Motorola bootloader unlocked warning screen, the ID has changed from “bad key” to “N/A”.
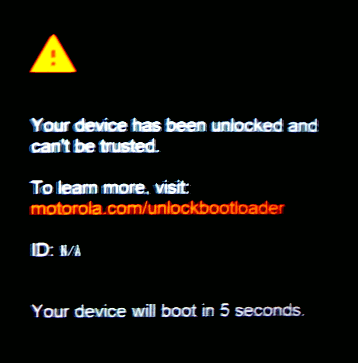
This is good indicator that you have been successful. If all did go well, in a few seconds you should see the TWRP main screen:
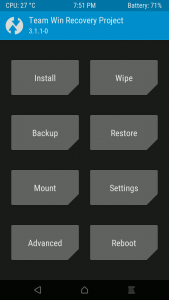
- It is now safe to reboot into the system without fear of having TWRP overwritten. In the main TWRP screen, press reboot, then press system.
If your system boots up correctly, you have succeeded. If for some reason something has gone wrong, please go back through each step and make sure you have followed them exactly. If you are still having problems, please post a comment below, and hopefully I or one of my readers can provide you assistance.
With your phone’s bootloader unlocked and TWRP installed, it’s time to take the final big step and root your Moto G5 Plus. That will be the subject of my next post. Look for it soon.
11 comments
Skip to comment form
Hi,
Is it possible to do a backup from the original rom and the original recovery before start replacing?
Ventura
Author
Speaking from experience, it is. I had to do it myself after borking my system. Here’s how I did it:
Hi Tony,
You have one of the best sites (if not the best) about Moto G5.
Thank you very much!
I was trying to open a system backup made with adb. The procedure that I found was:
dd if=backup.ab of=backup.tar.gz bs=1 skip=24
It seems that this procedure did work in the past for the backup version 1. Now the backup is in the version 4
and output file is not recognized as tar.gz . Do you have any update about that ???
Ventura
i successfully installed twrp . first time it twrp opens but after rebooting to system id:na change to bad key and trying to reopen twrp says no command . need urgent help
That just means that TWRP has not been able to patch itself to stay installed, and the phone reinstalled the stock recovery which indeed is supposed to say no command. After installing TWRP go directly into the bootloader and into recovery to fix. Good luck!
Me to, install twrp okay, first reboot recovery mode good, second recovery mode reboot “no command”
Seems to work, but when I boot to twrp my touchscreen doesn’t work at all so I can’t swipe the screen to open it. Rebooting resets it back.
In 2020 this post help me to install and recover my MotoG5 (3rd gen) thanks a lot. Cheers.
Having flashed twrp onto my Moto G5s plus I reboot but it does not boot into the twrp main screen. It goes into bootloader logs saying “Startup failed” Your device didn’t start up successfully. Use the software repair assistant on your computer to repair your device. I have followed the instructions and tried repeatedly with the same result. Any ideas would be most welcome.
i am having the same problem. have you found any solutions?